
DJI Mobile vs Osmo Pocket.
Through my love for creating content be it written, imagery or video, I have started to focus more on videography like many do, taking holiday footage and creating memorable videos.
I started capturing video using my old iPhone 7 (which shoots 4k at 30fps, 1080p HD at 30fps and 60fps, allowing you to shoot excellent quality smooth video, with the option to slow the footage down and keep it looking professional). Having found my new hobby, I wanted to find the cheapest option to be able to stabilise the footage so purchased a DJI Osmo Mobile 2. It cost about £100 at the time, but they have since launched the DJI Osmo Mobile 3 which is lighter, folds up better and is slightly cheaper!
The DJI Osmo Mobile 2 is an excellent gimbal. It really is a great piece of kit. The one major downside is that you have to precisely balance the mobile phone on the device to ensure it is correctly in position (otherwise the phone will not remain balanced). Sometimes, you get lucky and setup take around 5-10 seconds, but the slightest movement throws it off, so setting it up can be fiddly.
I have had no previous professional experience or training, instead, “an eye” and a passion to get “the shot”. With my new found hobby, my iPhone 7 and a DJI Mobile 2, I set out to learn and capture the best possible video of my trip to Ukraine and this is the result:
Later that year I visited Hurghada in Egypt. I took the experience I gained from my time spent filming in Ukraine and decided to use the same setup for my second travel video. I’m a huge fan of music, and before editing, I select a song which gives off the emotion I am trying to create from my work. In this instance I wanted the travel video to be happy, upbeat and feel-good whilst having sound elements which represent Egypt’s interesting culture. I decided to start the video with a tranquil beach/sea shot to instantly set the scene of paradise. For the rest of the video, I included a variety of shots from the resort grounds, beautiful beach area and our excursion to Paradise Island. I set myself goals to improve my skills and started to play around with “reveal shots”, “speed ramping”, and “colour correction” (a process used in post-production to enhance colours and make your video look better). One thing I have always made a point of NOT doing is making my videos about us (my wife and I). Instead, it is my aim to create videos which mostly focus on the destination to give viewers valuable content and an accurate insight into the resort, country, city etc. I must point out that I cannot take credit for the underwater shots in this second video, (which are probably the best shots in it!). I was kindly granted permission to use these from the excursion operators. So, here’s my second-holiday video filmed using my iPhone 7 and DJI Osmo Mobile 2:
For this second video, I spent a lot of time specifically on marketing it – I cannot stress enough how important this is. There are lots of ways to market a video, so I will write another separate blog, covering things like how to market your content, which social media platforms work best for marketing travel videos, and the importance of the video title/description/tags/thumbnail very soon. Investing time in smart marketing and understanding the little tips and tricks really did help my video get more views (which are currently at 6,211 on YouTube and 7,115 on Facebook). Happy enough with my progress, but eagerly wanting to continually improve I decided to invest in a camera, so I don’t have to set up the DJ Osmo Mobile each time I want to film. By this stage, I was already a huge fan of DJI so I decided to stick with them and researched into their cameras and alternative setups.
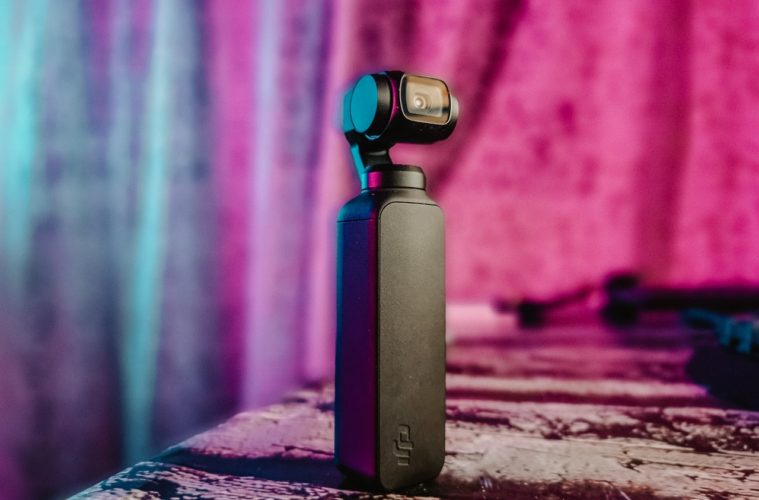
Luckily for me, a new product called the DJI Osmo Pocket was available. Priced at £279 I was curious to know more about this product. As its name suggests it fits into your pocket and is only 121.9mm tall and 28.6m wide – it’s tiny and weighs just 116g! I really loved the idea of this compact and handy camera instead of the larger and more awkward DJI Osmo Mobile / iPhone setup. After watching a lot of videos about the DJI Osmo Pocket I was hooked. The quality of footage people have managed to get out of this camera is incredible – the challenge was on! After doing a lot more research I was able to decide which settings I was going to use in my next video. It can shoot in 4k and 1080 resolutions, but there’s also a “Pro” setting, which once set, will appear in the top left corner – tap this to go into the Pro settings where you can switch between the normal colour mode or the D-Cinelike mode for those that want a flat colour profile (giving you more room for colour grading, in post-production). Pro mode on the DJI Osmo Pocket also allows you to manually set the shutter speed and ISO.
For more control (and the advantage of a larger viewfinder) simply connect your mobile phone using the connection adapter – I found this really useful when shooting in bright conditions, or when I needed to use movement whilst taking my shot. There’s a large selection of accessories for many different purposes, but as a basic setup, I’d recommend that you invest in the following:
1) The Osmo Pocket Expansion Kit. This includes a Controller Wheel (which slides onto the DJI Osmo Pocket for the ability to pan up/down, left/right for precise control), a wireless module (a necessity if you want to shoot time lapses), an accessory mount and 32GB Samsung microSD Card.
2) The Osmo Pocket Charging Case is another really important accessory. If you’re out and about a lot and want peace of mind that you won’t run out of battery life, then the Osmo Pocket Charging Case is a must. The battery life of the Osmo Pocket itself is great, but consider if you are shooting 4k, then battery life won’t last as long (recording time of 140 minutes when set to 1080p 30fps). It also provides extra protection to the camera because the cover which comes as standard with the Osmo Pocket is great, but it does not seal the gadget entirely. Therefore, if you’re filming anywhere dusty or on a beach, then particles or sand might be an issue and I didn’t want to risk it – the charger case closes and protects the camera whilst charging it.
3) ND Filters (neutral-density). To really raise the bar I decided to purchase the Polarpro Cinema Series Vivid Collection, and Limited Collection ND filters. The Vivid Collection has 3 filters, ND4/PL, ND8/PL and a ND16/PL. The Limited Collection comes as a set of 4: ND32, ND64, ND32/PL and ND64/PL. I found myself spending hours trying to understand what filters do and which ones I needed. Put simply, these are magnetic glass filters which you place on top of the camera. They act like sunglasses allowing the camera to focus on areas which might usually not be possible to film, such as bright skies. The higher the ND number the higher the tint, and the darker they will make the footage/picture. The “PL” stands for “Polarizing Filter” – this type of filter reduces glare and brings our better saturation and clarity. I was in a huge hurry before I left without enough time to research which number was required for which brightness, so I ordered them both and decided to learn this on the job! I was in Egypt and the sun was bright – I found myself using the ND64 in the peak daytime, and the ND32 as the sun started to go down a little. I haven’t done enough testing with the Polarized Filters versus the non Polarized ones, but, during the video post-production, I have noticed a strange outer shadow, which I think was due to the PL version. Both sets come in a really neat clear case.
4) Portable Case. Having invested quite a bit in this new setup, there are lots of small items which could easily get lost. So my final ‘must buy’ accessory is a case to keep everything safe and tidy. You can get a variety of styles/brands so I’d recommend checking out Amazon, as the case you select will depend on the accessories you decide to purchase.
There you have it, my new setup was complete and it was time to get to work! I had a lot to learn, and I also gave myself a long list of post-production improvements I wanted to make – the list of new skills I wanted to work on included:
- Sound Design
- Colour Grading
- Slow Motion & Speed Ramping
- Logo/Text Reveal
- Improved Transitions
- The 180 Degree Shutter Rule
- Filming at Golden Hour!
- Gimbal Moves (Parallax, Tilt-Up/Down, Tracking)
- Time Lapse
Whilst I am happy to invest in better equipment over time and as I develop my style and skills, I also believe you should out-grow your kit, by knowing fully how to use it before upgrading. Therefore, I will keep using the Osmo Pocket for a while to fine-tune my skills before I change my setup again. Below is my third and most recent travel holiday video, which I hope you will enjoy. Please do let me know what you think to my set-up and work, in the comments section below. I’m still a novice on a journey with the vision to become a pro and would welcome all feedback.